signs

Printing: Back to Basics Part 3

One of the most commonly asked questions in relation to graphics software and printing is how to increase the size of an image without getting blurring and jagged edges. New users are often surprised when they resize an image and find that the quality is severely degraded. In print projects, resolution is key. If the images that you include in a print project does not have high enough resolution, they will appear fuzzy, jagged, or blurry. The reason for the degradation is because bit mapped, or raster, image types are limited by their pixel resolution. When you attempt to resize these types of images, your software either has to increase the size of each individual pixel – resulting in a jagged image – or it has to “guess” at the best way to add pixels to the image to make it larger. Most printing companies require a minimum of 300 dpi for all images at the final print size. However, some printers require even higher resolution, so it’s always a good idea to check with your printer on their recommended printing resolution. Generally, the higher the resolution of your image, the better the quality the image will be when printed.

So, you have an image you want (or need) to use but it doesn’t meet the required dpi? What can you do?

First, you cannot use the common paint application that comes with Windows. Granted, you can do some basic editing of the image with this application, but it will not help you change the actual resolution of the image. In order to change the dpi, you will have to change the ppi (confused by ppi and dpi? click here). There are several software programs out that will allow you to do this but, for our purposes, I will concentrate on Photoshop. The most important thing to understand about resolution is the relationship between an image’s resolution (ppi) and an image’s print size (actual width and height -dpi). Pixels per inch (ppi) is often (although mistakenly) used interchangeably with dots per inch (dpi). Dots per inch (dpi) is a measurement describing the way an image is printed, scanned, or displayed on your monitor. For instance, you may scan an image at 300 dpi, print a 300 dpi image at 600 dpi, view it on your monitor at 72 dpi, but unless you resample it in Photoshop, the image will always have a resolution of 300 ppi.

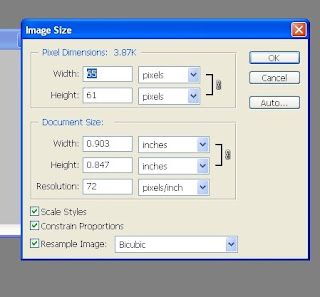
Open an image in Photoshop. Go to the Image menu and select Image Size. This is where you can change an image’s resolution and print size (width and height). The following Image Size dialog box will appear:

Note that the width and the height of the image as you view it on your monitor is not necessarily representative of the image’s actual width and height — the size it would print out at (Print Size). Average monitor resolution is 72 dpi. If you view a 72 ppi image at 100% in Photoshop, chances are that it will appear on your screen in its actual print size. However, this is not true when viewing a 300 ppi image. A 300 ppi image viewed on-screen at 100% will be enormous. Don’t get tricked into believing that what you see on your monitor is what you’ll get when you print or place the image into another application. The only way to determine what your image’s actual print size will be is through the Image Size dialog box.

When the Resample Image box is checked, any changes you make to an image’s width or height will not change the image’s resolution, and as such, any changes you make to an image’s resolution will not affect the image’s width and height. Keep in mind, however, when you increase width and height, or resolution, you are adding pixels to your image. These pixels don’t actually exist so Photoshop must create them. As such, you will succeed only in degrading the quality of your image.

If you want to increase an image’s width and height, or resolution, then uncheck the Resample Image box. Now any changes you make to the image’s width and height will change the image’s resolution, and vice versa:

  • If you decrease resolution, the width and height will increase
  • If you increase resolution, the width and height will decrease
  • If you increase the width or height, the resolution will decrease
  • If you decrease the width or height, the resolution will increase

The best way to increase the width and height of a scanned image is to scan the image in at a high resolution (about twice what your final resolution should be), and with the Resample Image box unchecked, decrease the resolution or increase the width and height—both will yield similar results. Once the image width and height is where you want it, you can then check the Resample Image box and type in the resolution you want. At this point, as long as you don’t increase resolution, or width and height, your image quality will not suffer.

Printing: Back to Basics 2

If you’re creating artwork for printing, you’ll only get decent results if you’ve got a basic understanding of image resolution. Don’t worry, it’s actually quite a simple concept – nowhere near as complex as some people seem to think. So stick with me here, I’m going to try to make this as painless as possible…

Resolution:

Resolution is a concept that continues to baffle even graphic artists. In the context of editing photos, resolution is a measurement of the output quality of an image. The most common units to measure resolution include: PPI (pixels per inch), DPI (dots per inch), LPI (lines per inch), and SPI (samples per inch). For our purposes, we will focus on DPI and PPI because that is what you will be dealing with most often when printing photographs.

As you probably know, when you view a photograph on your computer monitor you’re actually looking at a grid of tiny dots or ‘pixels’. Similarly, when a photograph is reproduced in print, it is made up of thousands of small dots of ink. Resolution refers to the number of these dots (or pixels) which are squeezed into a given area. The smaller the dot, the more dots you can fit into a horizontal inch, and the sharper an image will appear to the human eye (up to a point).
If you zoom into a photograph on your PC monitor you will be able to see the grid of pixels which make up the image.

The resolution of an image is usually measured in dots per inch (dpi) or pixels per inch (ppi). Essentially dpi and ppi refer to the same thing, it’s simply the number of dots or pixels which make up an image. For more information on pixels see my earlier post Vector -VS- Bitmap: A basic breakdown.

If you view an image on your computer monitor its resolution will need to be at least 72dpi to appear sharp and clear. A lower resolution will result in large pixels which will be detected by your eye, resulting in a fuzzy or ‘pixelated’ image. However, if the same image were reproduced on paper using a commercial printing process it would need a resolution of around 300dpi to achieve a sharp result.

A printed image requires a much higher resolution than an on-screen image (4 times greater to be precise). Therefore, just because your image looks sharp and crisp when viewed on-screen, it doesn’t mean it will reproduce correctly when printed.

Stay tuned in! Next time we will explore how to improve the resolution of an image for printing!

“Cheap” Is Not A Dirty Word

Once upon a time the word “cheap” was pretty much scoffed at and thought to be taboo- but it appears that this previously taboo word may have a bit more clout in today’s economy. According to an article published on iMedia by Tom Crandall,  CEO of Ayohwahr Interactive,  “cheap” is no longer a dirty word and he appears to be right. Where companies once felt that this word would reflect upon them badly, they are quickly coming to realize that “cheap” attracts customers.  Craig Mcdonald, in his recent post, asked, “How much is the word “cheap airfare” worth in the United States? The answer is about $8 million, according to comScore Marketer Search Data, December 2007.

To Quote Tom Crandall:

“According to the Google AdWords Keyword Tool, the average monthly search volume for the phrase “cheap insurance” typically amounts to 673,000 queries. Last month, the number of queries for this term rocketed to 2.7 million. Likewise, the average monthly search volume for the phrase “cheap car” is traditionally about 1 million queries. Last month, the volume exceeded 3.3 million.

So, as you consider incorporating adjectives such as “affordable,” “budget,” “inexpensive,” “low-cost,” and “thrifty” into your SEO strategies, consider this: There is a growing number of brands weaving the keyword “cheap” into their on-page SEO elements. (Many are even incorporating this term into their marketing copy!)”

Obviously this bad word has been given a reprieve and marketers are learning that it does not damage brand perception or curb profitability. So, I can hear you thinking…. how in the world does this apply to signs? Well, the name says it all 🙂 We are cheap and we are not afraid to tell the whole world!

What about you?

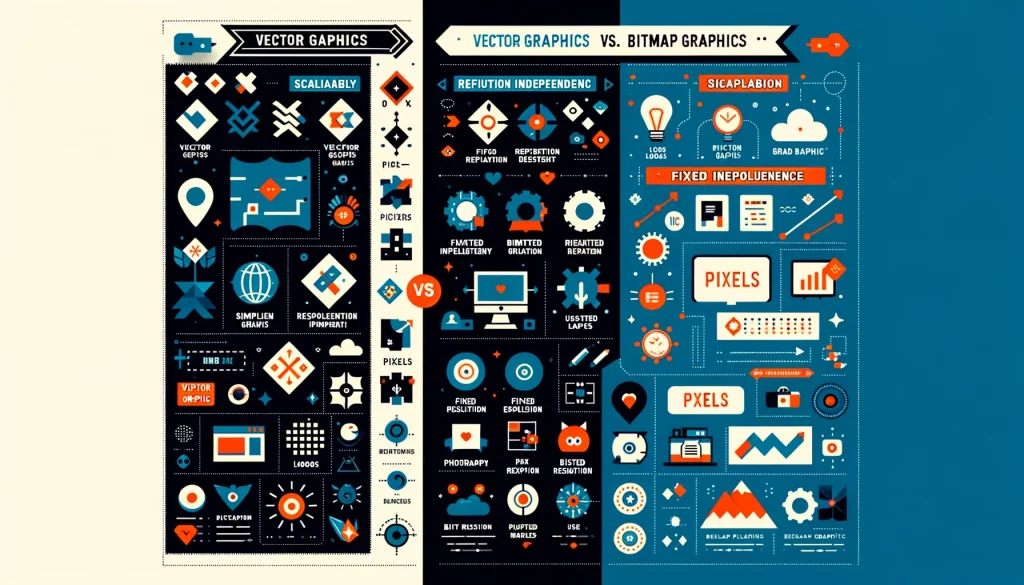
Vector vs Bitmap

Vector-vs-bitmap

Table of Contents

In the realm of digital design, especially when crafting visually compelling signs with images or logos, the choice between vector and bitmap (or raster) graphics is crucial. These two foundational types of 2D graphics serve distinct purposes and are essential tools in a designer’s arsenal.

Bitmap (Raster) Graphics: Pixel-Perfect Detail

Bitmap graphics are digital images composed of a matrix of pixels, where each pixel holds data for its specific color. This pixel-based structure means bitmap images have a set resolution and lose clarity when scaled beyond their original size. Commonly encountered bitmap formats include JPEG, PNG, GIF, and TIFF, each with its own use-case scenarios, from web images to high-quality print documents.

  • Key Traits of Bitmap Images:
    • Pixel-based composition
    • Fixed resolution, making resizing a challenge without quality loss
    • Versatile in usage, but restricted to rectangular shapes
    • Limited transparency support, depending on the format

Bitmap images are ideal for detailed, complex imagery like photographs, where capturing nuance is key. However, their dependency on resolution and difficulty in resizing without quality degradation can be limiting in dynamic design scenarios.

Vector Graphics: Scalability Meets Precision

Vector graphics, in contrast, are not defined by pixels but by paths based on mathematical equations. These paths outline shapes, colors, and fills, making vectors infinitely scalable without any loss of quality. This resolution independence of vector graphics makes them perfect for logos and sign designs that need to maintain sharpness across various sizes and mediums.

  • Key Traits of Vector Images:
    • Comprised of scalable objects, allowing for flexibility in design
    • Resolution independent, ensuring clarity at any size
    • Ideal for bold, graphic illustrations, logos, and text
    • Supports transparent backgrounds for versatile overlay applications

Common vector formats include AI (Adobe Illustrator), SVG (Scalable Vector Graphics), and EPS (Encapsulated PostScript), among others. These formats are favored for their adaptability and precision, especially in branding and marketing materials where visual impact is paramount.

Choosing Between Bitmap and Vector

The choice between bitmap and vector graphics depends on the project’s needs. Bitmaps are unbeatable for intricate, photo-realistic images, while vectors offer unmatched scalability and simplicity for graphic designs. Understanding the strengths and limitations of each can significantly impact the effectiveness of your visual communication.

For detailed guidance on file formats supported and how to best prepare your designs for production, exploring further resources or consulting with design professionals is recommended. Embracing the right graphic type not only ensures your designs are visually stunning but also optimizes your workflow for efficiency and impact.

How To Create A Great Outdoor Sign

Before you design your sign, be sure to consider the intended display area for your signs. Many graphic artists make the mistake of creating designs that look fabulous on their screen but not so fabulous for a large display sign. Whereas text conveys the message in an electric file, graphic design conveys the message in a large printed product such as banners and cortex Bandit signs. This is why it is so important to have minimal written content.

With all the competition available in today’s world, it’s important to best utilize the sign colors and space to produce the best possible advantage. The right text will give the most import information needed, such as contact information. But it is the colors, the layout and the design which will grab new customers.

To maximize the impact of your signs, be sure to take into consideration where you want to place your signs. The placement of your signs plays a big role in how many new customers you gain.

Here are some quick tips prior to placing your Super Cheap Signs order.

  1. View a couple of the areas or the location you will be placing your signs. Guess work can create a lot of wasted space. Outdoor signs are designed for pedestrians and motorists, the signs are expected to be more visible from farther distances than indoor signs. If most the new customers you want to attract will see them at night, you don’t want a black background with yellow letters.
  2. Vinyl banners are primarily used for its visual impact more than its word content. The visual display should be able say its message in seconds with a picture and minimal text. Use contrasting colors so the words and or pictures stand out. The colors you use in your banner should not match the color of the building or placement to which you will be using to hang the banner from.
  3. Consider who will be reading the sign and who you want to read the sign. If you own a coffee shop and the community is dog friendly, your banner can show a dog sitting at a table while its owner drinks coffee.

Fonts and Typefaces Could Make The Difference

Fonts and typefaces and sizes, oh my; I mean this is pretty boring stuff. Nobody really wants to hear about it or think about it, even me, and my livelihood depends on it. Letters are the single most important part of a sign or banner, they are the building blocks of your message.

It may be a boring topic, but I can tell you this: nothing can screw up a sign faster than typeface experiments. With that said, here are my helpful type-tips:

  • Boring fonts usually work best if you’re considering a type-face with a name like Lounge Bait or Mighty Tomato, please just stop what you’re doing and count to ten. Old stand-bys are called that for a reason, they are clean and readable use them.
  • Avoid too many words it’s tempting to put a lot of information on your sign.  Don’t do it!  Simple is best. You are not making a menu for people to sit and ponder.  You have one chance (about three seconds) to target your desired audience and then you’re done.
  • Use the right size type try to figure out how far away people will be from your sign when they read it and select your letter size accordingly. Check out the helpful chart below, it will help you build a readable sign.

MAXIMUM READABLE DISTANCE

READABLE DISTANCE FOR
MAXIMUM IMPACT

LETTER HEIGHT

100′

30′

3″

150′

40′

4″

200′

60′

6″

350′

80′

8″

400′

90′

9″

450′

100′

10″

525′

120′

12″

630′

150′

15″

750′

180′

18″

1000′

240′

24″

1250′

300′

30″

1500′

360′

36″

1750′

420′

42″

2000′

480′

48″

2250′

540′

54″

2500′

600′

60″

Size Does Matter (Sign Sizes, That Is)

What can I say? Sometimes, I think of the headline before the blog topic. In this case though, it is relevant. People always come into the shop and ask us what sign size they should get.

Signs come in a bunch of sizes: 9×24, 12×18, 18×24, 24×24, and 24×3 and that’s just yard signs. Throw in custom banner sizes and you can get a sign in virtually any size. But what’s the best size?

I can tell you the most popular size, that’s the 18×24 standard plastic yard sign. It might not be the right size for your purpose, but it offers a good compromise between affordability and printable surface area. It’s large enough to be readable from a relatively fast moving vehicle, yet cheap enough to allow you to purchase several signs to increase your advertising area.

Three things to consider when deciding on sign size:

  • Speed of the vehicles that will see your sign – larger signs work better at higher speed limits.
  • Complexity of message – a more complex message, requires a larger sign (see our 3 second rule to simplify your message)
  • Area of advertising zone – more signs are better for a large advertising area. Smaller signs are cheaper so you can get more for the same price.

On our web site, you can experiment with sign size and quantity to get the best per-sign price before you even design the sign.